At work, I’ve recently upgraded our old PDF/Word Doc forms for client onboarding for both Digital Marketing and New Website Builds. I chose to use Google Forms to do this and embed them into the website. This way the sales & marketing teams can easily build out and edit forms for competitions and onboarding various forms without having to get the development team involved.
One snag I hit though was that we all have our emails set up with Microsoft Outlook rather than Gmail so I cannot seem to connect our primary emails to the form. But with some messing around I found a solution.
Our shared Gmail account that we use for shared activities is not ideal for this as the sales team does not monitor it, plus by default, it was filtering to the updates folder which doesn’t usually have anything too exciting in it.
Step 1. Enable Email Notifications in Google Form Responses Tab

Toggle from Questions view to Responses view then click the 3 dots.
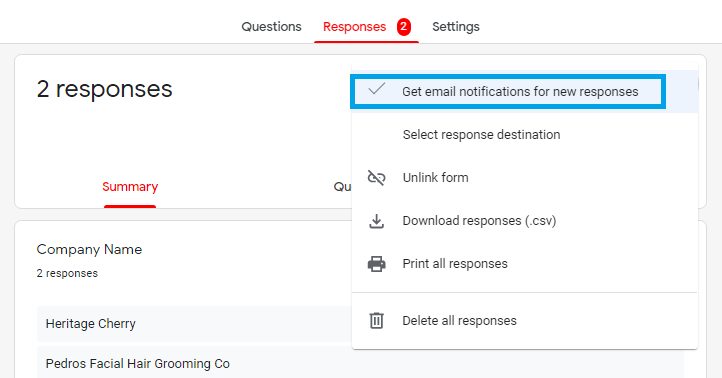 Then click “get email notifications for new responses”.
Step 2. Do a test of your survey to ensure your Gmail account gets a response email.

Click the “Send” button to access the live link for testing.
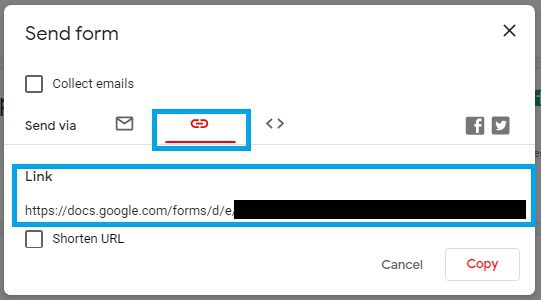
Click the Link icon and then paste the form into your browser and test the form, being sure to submit it. Check that you received the email in your Gmail account.
Step 3. Connect email forwarding
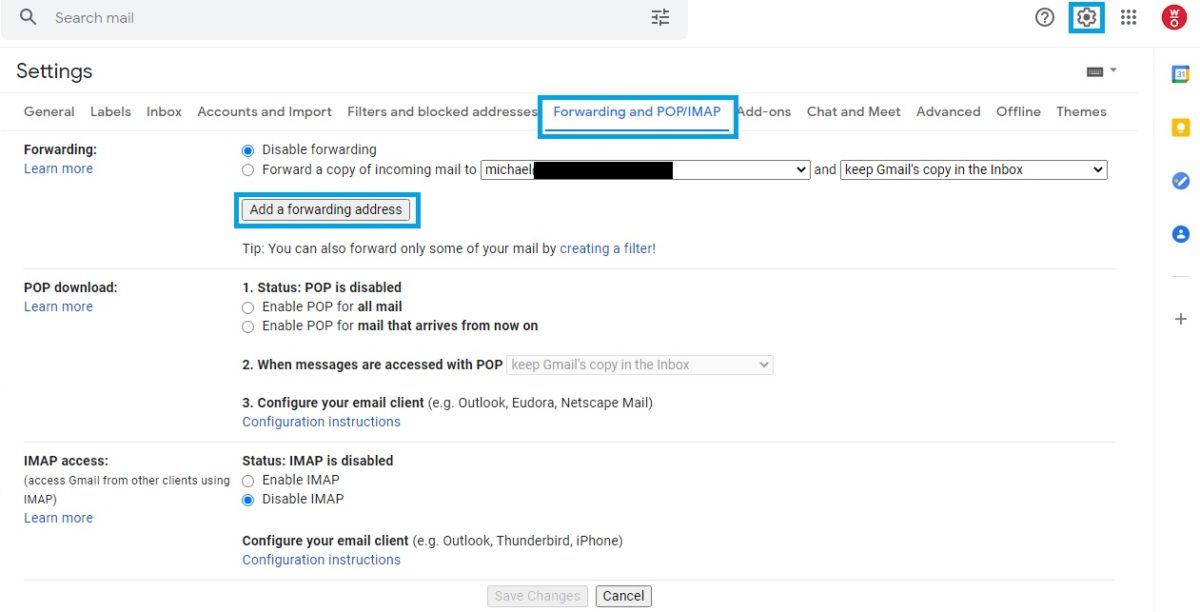
Click the settings cog in Gmail, and go into Forwarding and POP/IMAP. Then click the button “Add a forwarding address”.
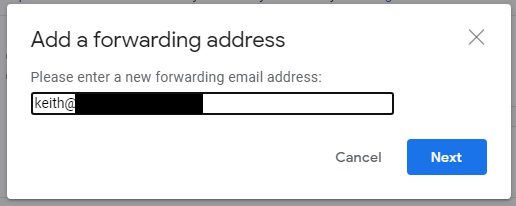
There will then be a popup to confirm and then a confirmation message.
You then return to this section where you can control the forwarding and add a verification code.

Check your emails and paste the code to verify. Leave “Disable forwarding” ticked as it will start forwarding ALL your emails to an address, which is probably not what you want to do.
Step 4. Return to your email inbox and find the email
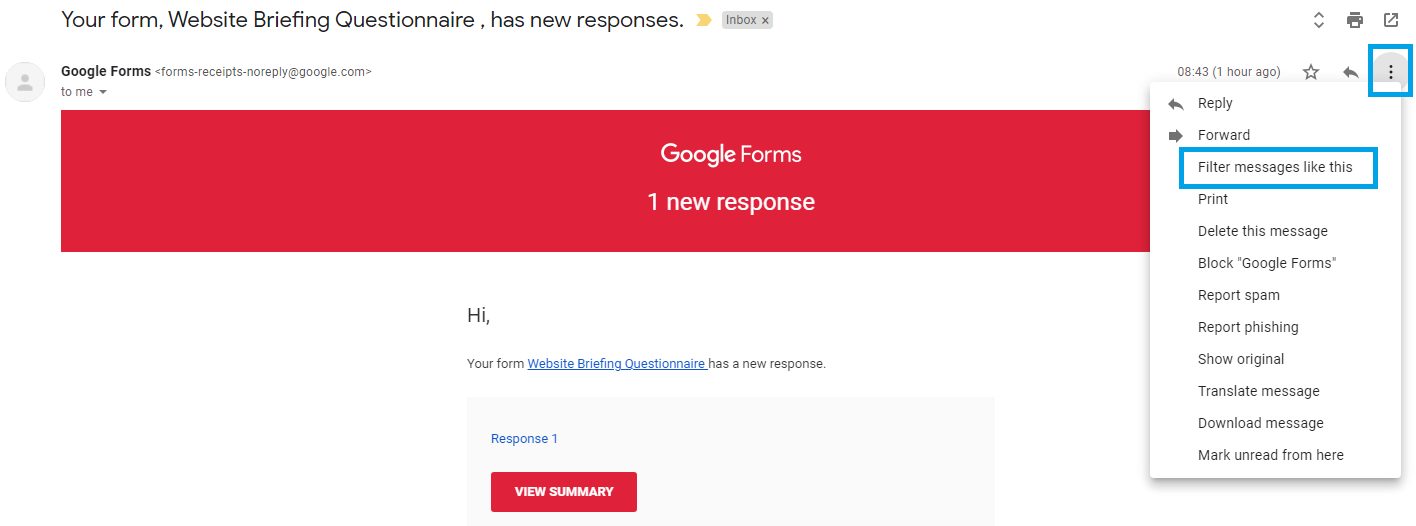
Click “Filter messages like This”. It will bring up the popup below.
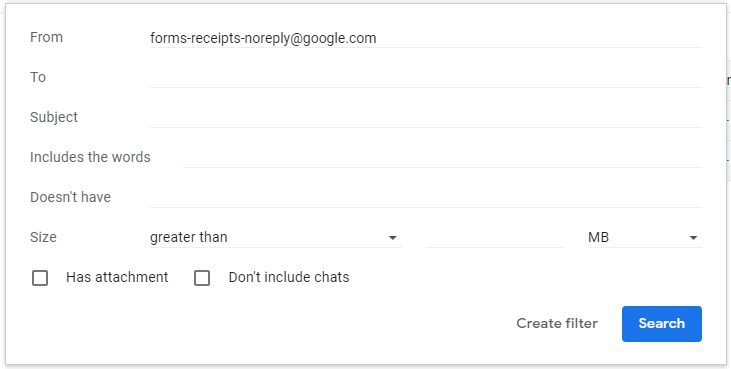
By default it will suggest filtering all emails from forms-receipts-noreply@google.com – for my purpose this is sufficient, but if you are a larger organisation, you may choose to receive only certain Google Forms. To do this, add the subject line in here. Then Click Create Filter.
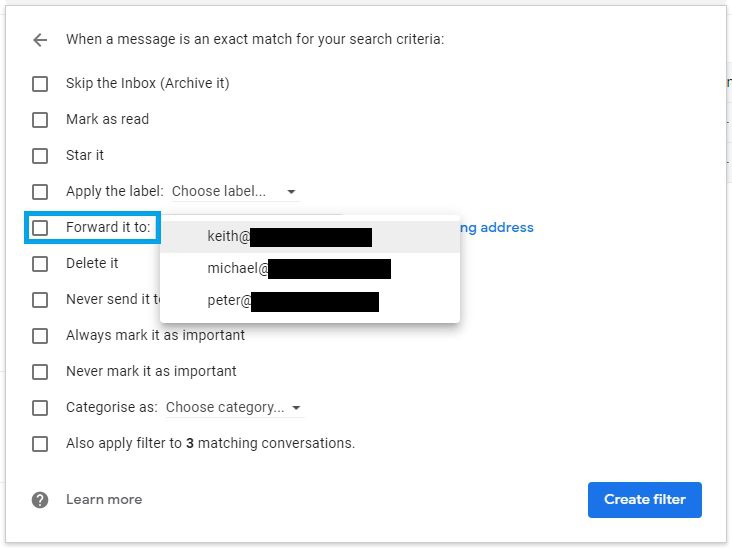
You can now select “Forward it to” and choose the email address you have previously enabled forwarding to. You may also wish to tick the box for “Mark as read” to help reduce the clog of unread emails in the main inbox.
After this, do a demo Google Forms submission to ensure that appropriate emails receive the confirmation details.
